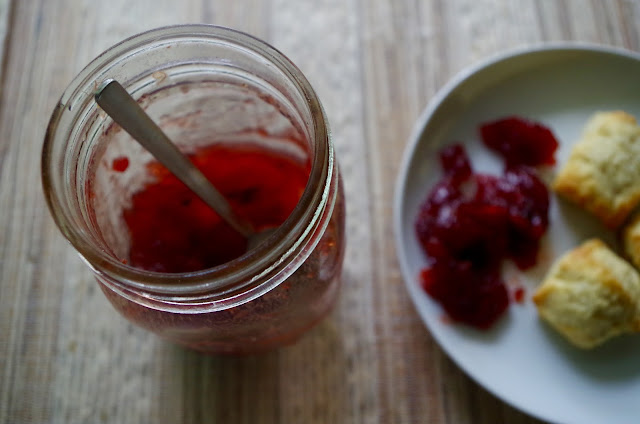
Strawberry Vanilla Jam
I have spoken before about the importance of canning in my family and about my own initial forays into this world of setting aside food for later months. For me, canning and jam making and food preserving are connections back to my own grandmother and aunts.
I know I am neither alone nor original in this connection, and these days it's quite trendy to preserve, ferment, and cure one's food. And while I am fully ensconced in this trend, I hope and want for this to be much more lasting than skinny jeans, bubble necklaces, and jeans tucked into knee high boots. (Although I admit that one of these trends is one I am hoping will come back. I'll let you try to determine which one.)
Canning takes commitment, or at least a full afternoon. But this particular jam really is worth it. And while I cannot necessarily say that I have any of this left for the winter months (it's true, I have either eaten or given away the full batch), I do think this is one recipe worth making again. And again. And, why not? Again.
A few notes:
- I got really busy, and I accidentally let the strawberries sit in the fridge for three days with the vanilla. This is no longer accidental in the recipe. It is now mandatory, because the extra vanilla-y flavor is transcendent.
- I had rhubarb (I know, it's no longer rhubarb season, but I had some leftover and, believe it or not, I saw some in the supermarket yesterday long after I had added it to this jam (not necessarily a vote in its favor)). So I threw some in. Take it or leave it--it doesn't matter.
- My recipe did not make as much as Marissa McClellan promised. I would like to hold this against her, because I would have liked 7,642 jars of this. Instead, I got three jars. Three. That's it. And I guess I have to hold the strawberries responsible. Not Marissa. (By the way, she only promises four jars.)
- Sweet lord. Sweet, sweet lord. She suggests that this is "toe-curlingly good." She does not lie.
Okay, people. That's all I've got. Go curl your toes. Just one last time before the strawberries are all gone.
Strawberry Vanilla Jam
Adapted from Marisa McClellan's Food in Jars
Yield:
4 (1-pint) jars
Ingredients:
8 cups hulled and chopped ripe strawberries (about 2 dry quarts) (I used a combination of strawberries and rhubarb)
5 cups granulated sugar, divided
2 vanilla beans, split and scraped
Zest and juice of 2 lemons
2 (3-ounce) packets of liquid pectin
5 cups granulated sugar, divided
2 vanilla beans, split and scraped
Zest and juice of 2 lemons
2 (3-ounce) packets of liquid pectin
Instructions:
1. In a nonreactive bowl, combine the strawberries with 1 cup of the sugar and the vanilla bean seeds and pods. Let the mixture sit at room temperature until the sugar begins to pull the liquid out of the berries, about 15-30 minutes. Then cover and refrigerate for at least an hour, but ideally overnight, or even for three days (which is what I did, and I stand by it).
2. When you are ready to make the jam, prepare the boiling water and 4 pint jars and lids (See below: To Sterilize the Jars).
3. Remove the macerated strawberries from the refrigerator and pour everything into a large, nonreactive pot. Add the remaining 4 cups of sugar and lemon zest and juice. Stir to combine. Bring to a boil over high heat, and cook on high heat for 15-20 minutes, stirring regularly until it takes on a thick, syrupy consistency.
4. Remove the vanilla bean pods from the mixture. Transfer about 1/3 of the mixture to a blender and puree. Return the pureed fruit to the pot.
5. Add the pectin to the fruit mixture and bring to a rolling boil. (Strawberries don't have a lot of pectin, so you need to add a substantial amount of pectin.) Let the jam boil vigorously until it reaches 220 degrees Fahrenheit (105 degrees Celsius) on a candy thermometer and remains at that temperature for 2 minutes.
6. Remove the pot from the heat and ladle the jam into the prepared jars, leaving 1/2 inch head space. Wipe the rims, apply the lids and rings, and process in a boiling bath for 10 minutes (See below: To Seal the Jars). This jam is fantastic with scones, atop oatmeal, and tucked into strawberry shortcake. But one might even consider using it in cocktails. I don't judge.
To Sterilize the Jars:
1. If you're starting with brand new jars, remove the lids and rings; if you're using older jars, check the rims to ensure there are no chips or cracks.
2. Put the lids in a small saucepan, cover with water, and bring them to a simmer on the back of the stove.
3. Using a canning rack, lower the jars into a large pot filled with enough water to cover the jars generously. Bring the water to a boil.
4. While the water in the canning pot comes to a boil, prepare the strawberry jam (or whatever product you are making).
5. When the recipe is complete, remove the jars from the canning pot (pouring the water back into the pot as you remove the jars). Set them on a clean towel on the counter. Remove the lids and set them on the clean towel.
To Seal the Jars:
1. Carefully fill the jars with the jam (or any other product). Leave about 1/2 inch headspace (the room between the surface of the product and the top of the jar).
2. Wipe the rims of the jars with a clean, damp paper towel.
3. Apply the lids and screw the bands on the jars to hold the lids down during processing. Tighten the bands with the tips of your fingers so that they are not overly tight.
4. Carefully lower the filled jars into the canning pot and return the water to a boil.
5. Once the water is at a rolling boil, start your timer. The length of processing time varies for each recipe; for the jam, cook for 10 minutes at a rolling boil.
6. When the timer goes off, remove the jars from the water. Place them back on the towel-lined counter top, and allow them to cool. The jar lids should "ping" soon after they've been removed from the pot (the pinging is the sound of the vacuum seals forming by sucking the lid down).
7. After the jars have cooled for 24 hours, you can remove the bands and check the seals by grasping the edges of the jar and lifting the jar about an inch or two off the countertop. The lid should hold in place.
8. Store the jars with good seals in a cool, dark place. And jars with bad seals can still be used, just do so within two weeks and with refrigeration.


Comments
Post a Comment