Vanilla Citrus Marmalade (Liberally Adapted from Marisa McClellan's Three Citrus Marmalade)
I love a good challenge and the husband loves a good marmalade. This is a match made in heaven.
Marisa McClellan from Food in Jars has set forth a Mastery Challenge, and I could not resist. Her intention? Get as many people as possible canning and preserving and get them feeling confident about it. And so, for the next year, she set forth this calendar:
- January – Marmalade
- February – Salt Preserving
- March – Jelly
- April – Quick Pickles
- May – Cold Pack Preserving
- June – Jam
- July – Hot Pack Preserving
- August – Low Temperature Pasteurization
- September – Fruit Butter
- October – Drying and Dehydration OR Pressure Canning
- November – Fermentation
- December – Fruit Pastes
Aren't you excited? I know I am.
While I am growing in confidence with fermentation, see here, I still feel like a novice in all other categories. And while I have been trying to up my canning game (see here, here, here, and here), I definitely could use some gentle direction, hand-holding, and from time to time some no-nonsense guidance.
McClellan posted recently a short primer, How to Make Small Batch Marmalade, which I somewhat ignored, and I instead turned to her wonderful book Food in Jars, which has not yet led me astray. She had a recipe for Three Citrus Marmalade, and I had a bowl full of citrus--grapefruit, navel oranges, lemons, clementines--and two vanilla beans burning holes in my pocket. So I dabbled and changed and played, and I came up with Vanilla Citrus Marmalade.
People. People, are you listening?
Go make this.
Before I wax on about the end product, let's walk through the (somewhat labor-intensive but totally worth it) steps.
Try to give some away. But really, you're going to consume most of it. We both know it. And there is no judgment there. I have eaten some of mine with a spoon. Sure, McClellan speaks of using it with chicken to make a fast and "healthier" sweet and sour chicken. Sure, you could put it on an English muffin. But really, a spoon is fine.
People. People, are you listening?
Go make this.
Before I wax on about the end product, let's walk through the (somewhat labor-intensive but totally worth it) steps.
1.) Zest your citrus and cut it into strips (and squares and shards). Boil these up to make 'em tender and then drain (save the water).
2.) Supreme your fruit. This is the most time-consuming part of the process. You need to separate the fruit from the pith and membranes and seeds. I am going to admit, I did this for about half of the fruit. Then I gave up and juiced some of it. Don't tell. But I do recommend doing this while listening to the rain and to Ella Fitzgerald. It's a lovely way to spend a morning.
3.) Sterilize jars and lids.
4.) Cook and cook and cook and cook the zest with the fruit and juice and vanilla beans. And then cook a while longer. Get it to 220 degrees. This takes forever. But the moment it gets to 220 degrees, there is a noticeable change in texture and the smell turns caramel-y and rich. Don't stop at 215. Don't do it. You'll be tempted and you will not be rewarded.
5.) Fill and seal jars.
6.) Consume.
 |
| Close. But not quite there. Don't give up. |
Try to give some away. But really, you're going to consume most of it. We both know it. And there is no judgment there. I have eaten some of mine with a spoon. Sure, McClellan speaks of using it with chicken to make a fast and "healthier" sweet and sour chicken. Sure, you could put it on an English muffin. But really, a spoon is fine.
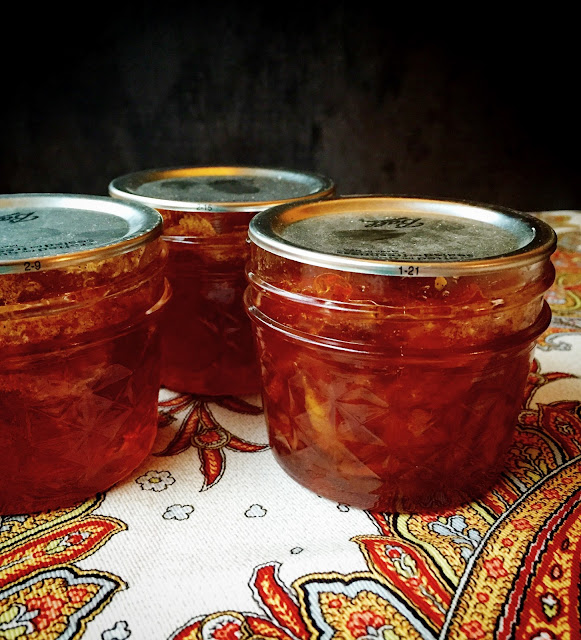
What a wonderful way to spend a very rainy Sunday. And these little pots of marmalade are so sunshiny and bright.
I gotta say that I love this marmalade. The vanilla deepens the taste, making it almost like caramel. The almost buttery and warm quality of the vanilla tempers the acidic citrus. With no dominant citrus flavor--I do like the tangerines, though!--this marmalade feels decadent and heady and rich.
Now to make myself give some away.
------
Vanilla Citrus Marmalade
Very Liberally Adapted Three Citrus Marmalade from Marisa McClellan's Food in Jars
Yield3½ Pint Jars
Ingredients
4 pounds assorted citrus (I used lemons, tangerines, oranges, and grapefruit)
5½ cups granulated sugar
2 vanilla beans, split and scraped (seeds reserved)
Instructions
1. Wash and dry the fruit. Using a vegetable peeler, remove the zest from the fruit. Cut the zest strips into a confetti of varying sizes. Combine the zest in a pot with 4 cups of water. Bring to a boil, reduce temperature to medium high and simmer for 30 minutes, until the zest is tender.
2. While the zest cooks, cut the white pith away from the fruit and supreme the fruit (separate the fruit from the membranes). Collect the fruit and any juices in a large bowl and set the membranes and any seeds aside.
3. When all the fruit has been broken down, bundle the reserved pith and seeds into a length of cheesecloth, tying the cloth well so that no seeds can escape.
4. Drain the now-tender zest, reserving the cooking liquid.
5. Prepare a boiling water bath and 4 regular-mouth 1-pint jars (see To Sterilize the Jars below).
6. In a large stainless steel or enameled cast iron pot, combine zest, citrus fruit, 4 cups of zest cooking liquid, 5½ cups of sugar, 2 vanilla bean pods, vanilla seeds and the cheesecloth bundle.
7. Bring to a boil and cook vigorously until the mixture reaches 220 degrees (this takes between 30-60 minutes).
8. When the marmalade reaches 220 degrees and sustains it for one minute, remove the pot from the heat. Stir for about a minute off the heat, to help the zest bits become evenly spread throughout the preserve. Remove the vanilla bean pods.
9. Fill prepared jars (see To Seal the Jars), wipe rims, apply lids and screw rings. Lower into a prepared boiling water bath and process for five minutes at a gentle boil (do not start counting time until the pot has achieved a boil).
10. When time is up, remove jars from the pot and let them cool completely. When they are cool to the touch, check the seals by pushing down on the top of the lid. Lack of movement means a good seal.
To Sterilize the Jars:
1. If you're starting with brand new jars, remove the lids and rings; if you're using older jars, check the rims to ensure there are no chips or cracks.
2. Put the lids in a small saucepan, cover with water, and bring them to a simmer on the back of the stove.
3. Using a canning rack, lower the jars into a large pot filled with enough water to cover the jars generously. Bring the water to a boil.
4. While the water in the canning pot comes to a boil, prepare the marmalade (or whatever product you are making).
5. When the recipe is complete, remove the jars from the canning pot (pouring the water back into the pot as you remove the jars). Set them on a clean towel on the counter. Remove the lids and set them on the clean towel.
To Seal the Jars:
1. Carefully fill the jars with the marmalade (or any other product). Leave about ¼-inch headspace (the room between the surface of the product and the top of the jar).
2. Wipe the rims of the jars with a clean, damp paper towel.
3. Apply the lids and screw the bands on the jars to hold the lids down during processing. Tighten the bands with the tips of your fingers so that they are not overly tight.
4. Carefully lower the filled jars into the canning pot and return the water to a boil.
5. Once the water is at a rolling boil, start your timer. The length of processing time varies for each recipe; for the marmalade, cook for 10 minutes at a rolling boil.
6. When the timer goes off, remove the jars from the water. Place them back on the towel-lined counter top, and allow them to cool. The jar lids should "ping" soon after they've been removed from the pot (the pinging is the sound of the vacuum seals forming by sucking the lid down).
7. After the jars have cooled for 24 hours, you can remove the bands and check the seals by grasping the edges of the jar and lifting the jar about an inch or two off the countertop. The lid should hold in place.
8. Store the jars with good seals in a cool, dark place. And jars with bad seals can still be used, just do so within two weeks and with refrigeration.


Comments
Post a Comment